In this tutorial, I will show you how to install any addon on Kodi. The method outlined can be used on FireStick, Fire TV Cube, New FireStick 4K, New FireStick 4K Max, Fire TV, Android Boxes, Android Mobiles, and all other Kodi-supported devices.

We have separate guides for most of the addons featured on our list of the best addons for Kodi. However, some new addons may not have an installation guide.
This post is a general installation guide for Kodi addons. You may use it as a reference if you encounter any addon on the list without a guide.
The description of each addon on our list contains the URL for its repository. You can use the URL and follow the instructions in this guide to install the addon.
The instructions in this post apply to most Kodi addons. Usually, only the names of the repositories vary. Everything else is much the same.
Attention Kodi Users!
Governments and ISPs across the world monitor your online activities. If you use third-party Kodi addons, you should always use a good Kodi VPN and hide your identity so your streaming experience doesn’t take a bad turn. Currently, your IP is visible to everyone.
I use ExpressVPN, the fastest and most secure VPN in the industry. It is very easy to install on any device, including Amazon Fire TV Stick, PC, Mac, and Smartphones. Also, it comes with a 30-day money-back guarantee. If you don't like their service, you can always ask for a refund. ExpressVPN also has a special deal where you can get 4 months free and save 61% on the 2-year plan.
Read: How to Install and Use Best VPN for Kodi
Installation Prerequisite
Most Kodi add-ons come from unofficial sources and are not hosted in the official Kodi repository.
Kodi has a restriction to prevent the automatic installation of addons from unknown sources for security purposes. Therefore, the first step is to remove this restriction.
Here’s how:
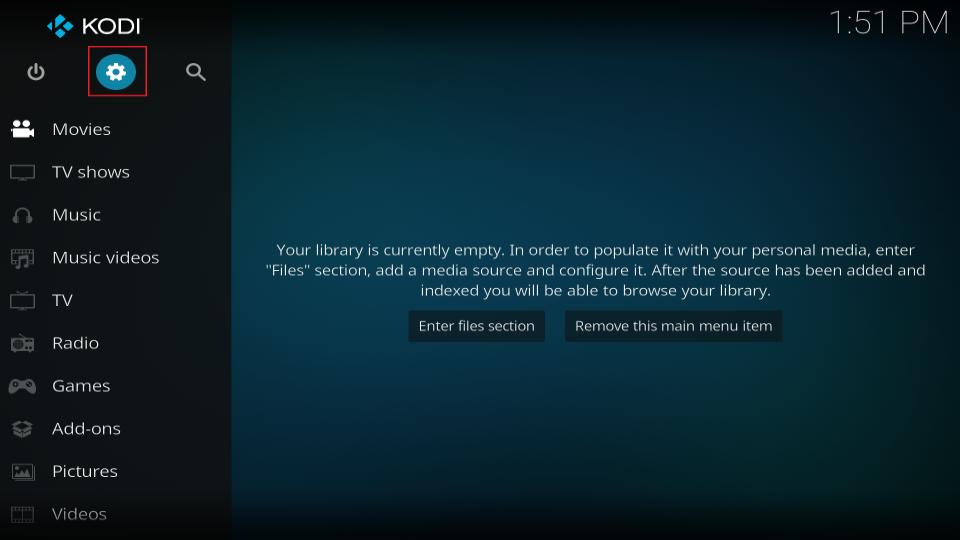
1. Open Kodi and then open Settings from the home screen.
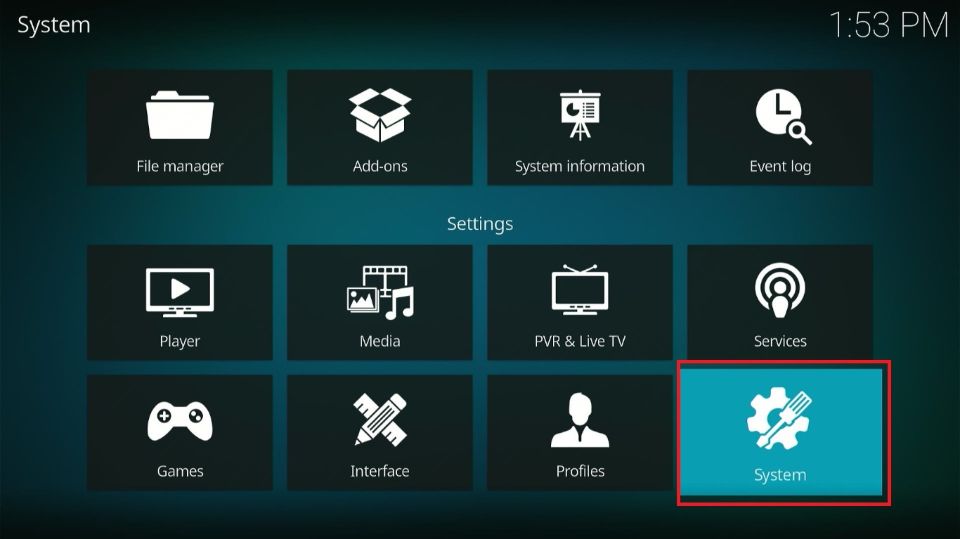
2. Click System.
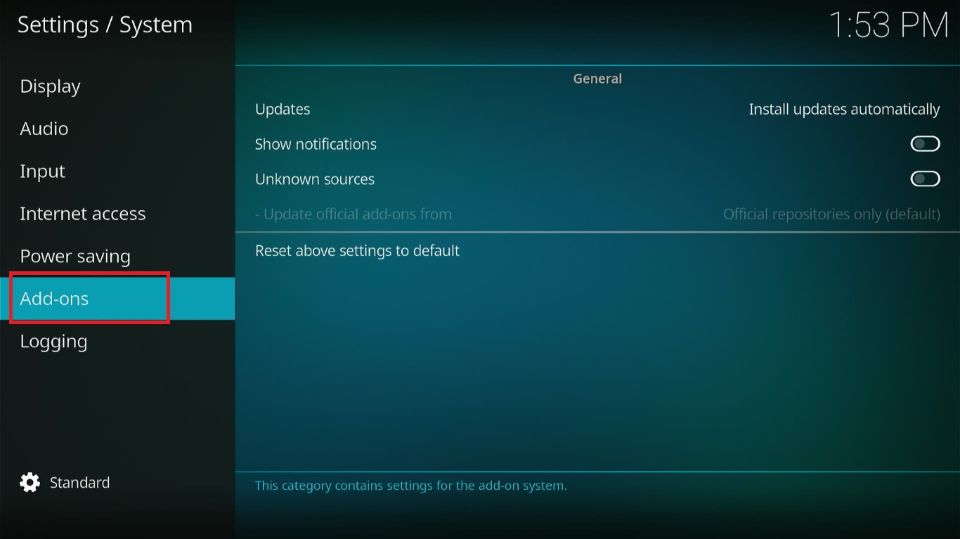
3. Next, select Addons on the left of the screen.
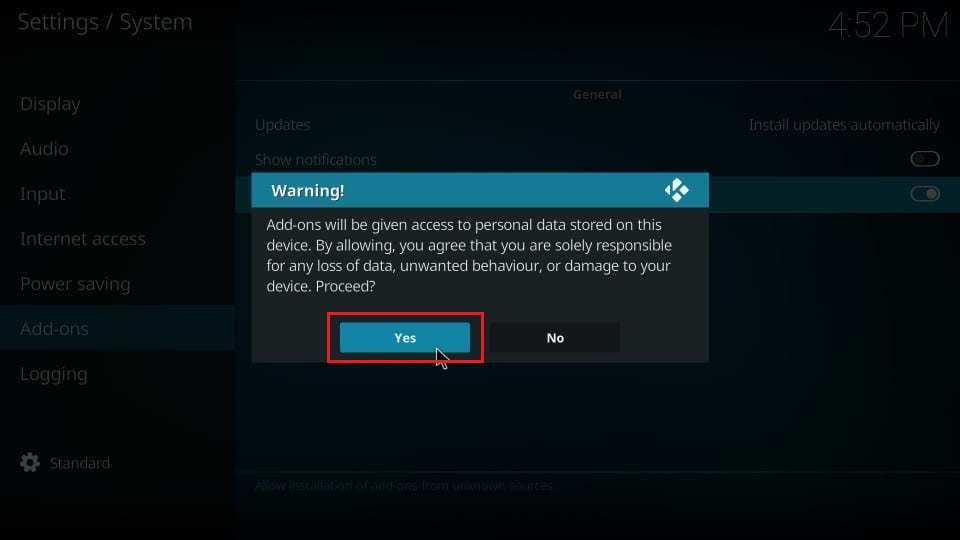
4. Now, find the option Unknown Sources on the right. If it’s disabled, select it to enable it.
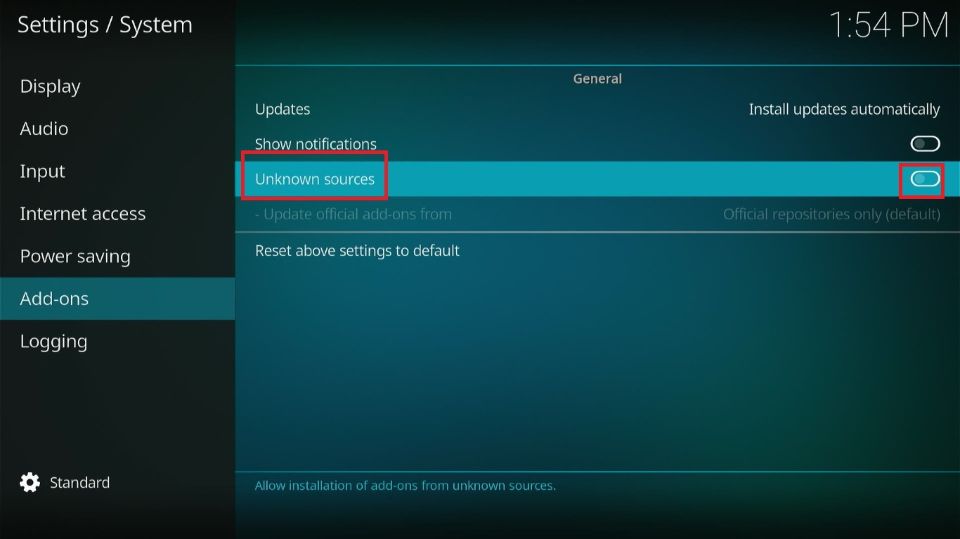
5. When prompted, click Yes.
How to Install Any Addon on Kodi
Installing a Kodi addon is relatively easy. The process follows three primary steps:
- Part 1: Adding the Source
- Part 2: Installing the Repository
- Part 3: Installing the Addon
I will use the Unleashed addon for demonstration in this guide. This addon works on all Kodi variants, including Kodi 19 and 20.
Legal Disclaimer: This tutorial is purely educational. FireStickTricks.com doesn’t own, host, operate, resell, or distribute any streaming apps, addons, websites, IPTV or services. The page contains some unverified services, and we are not certain whether they hold legal licenses to distribute the content. FireStickTricks.com does not verify the legality of each app/service in all regions. Do your due diligence if you use any of the unverified apps/services, and stream only content that is available in the public domain. The end-user shall be solely responsible for the media accessed.
Part 1: Add the Source
We are going to add the source now. Here are the steps:
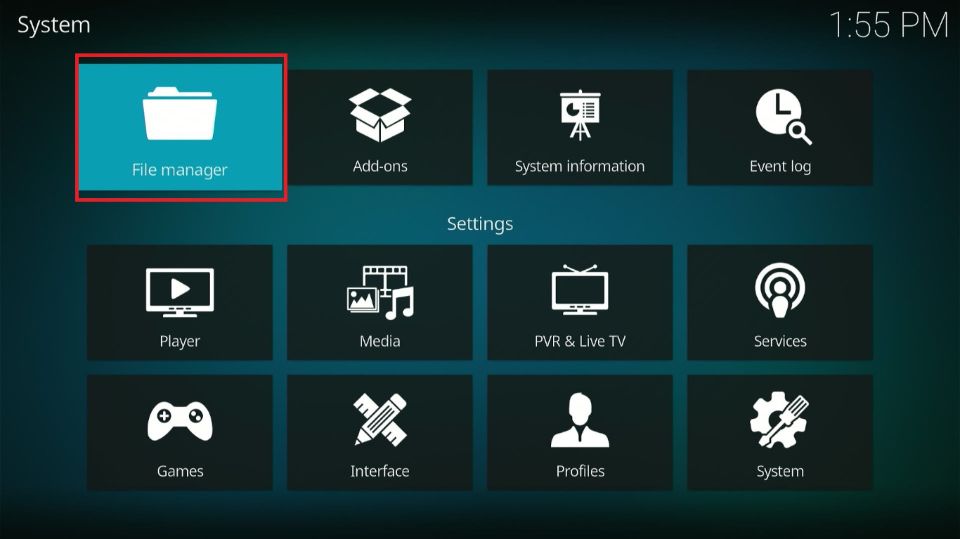
1. Launch Kodi and click the settings symbol right below the Kodi icon at the upper-left corner of the home page.
2. Click the File Manager box.
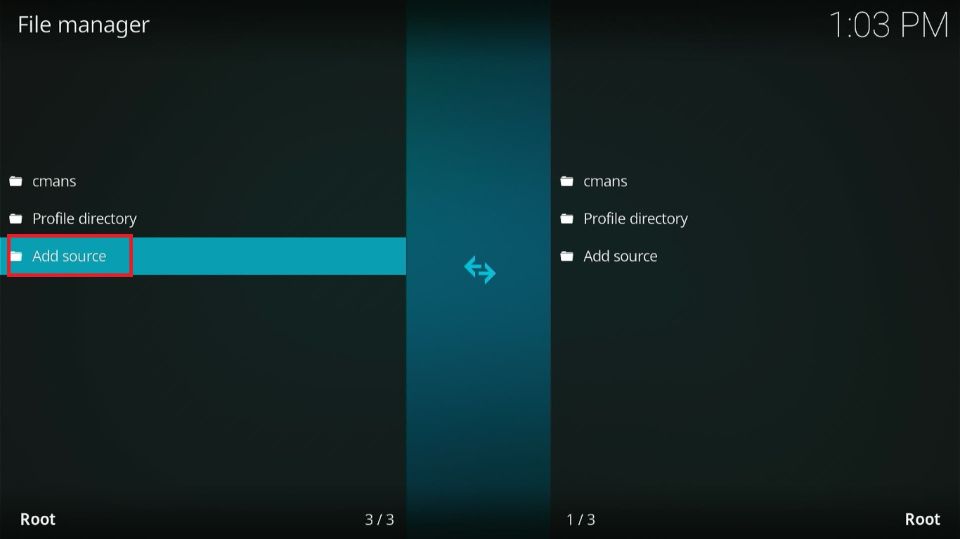
3. Go to the Add Source tab on the left side menu and click on it to open.
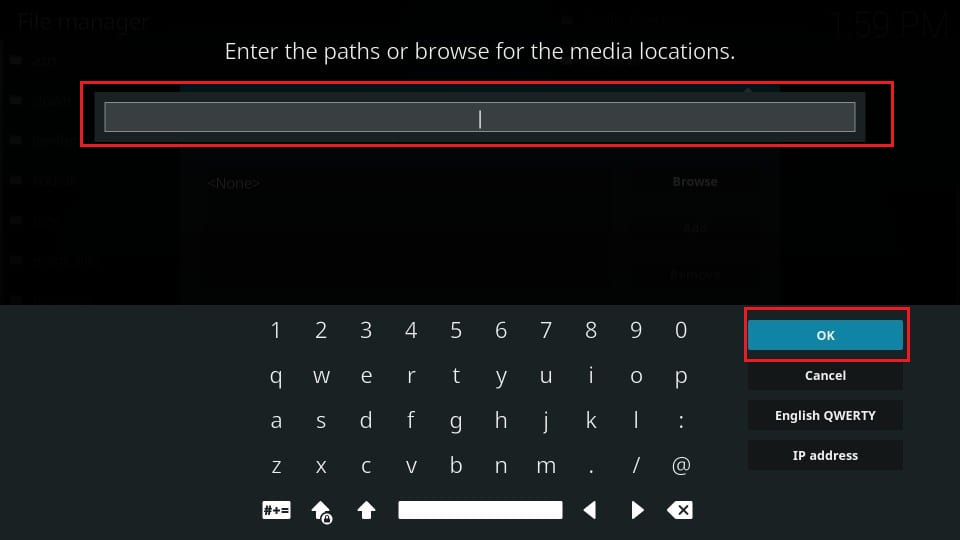
4. A popup window will appear. Click the <None> tab inside.
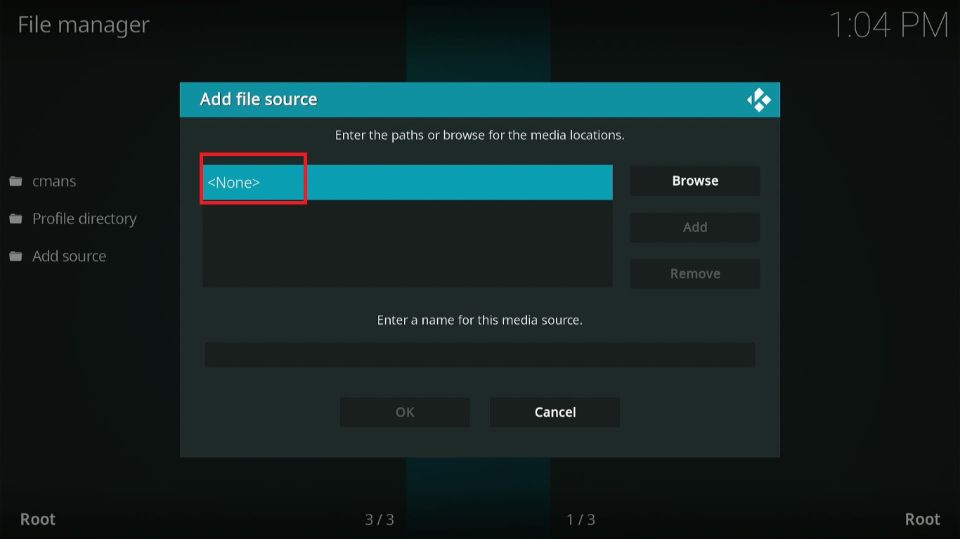
5. Enter the source URL in the designated field at the top and click OK.
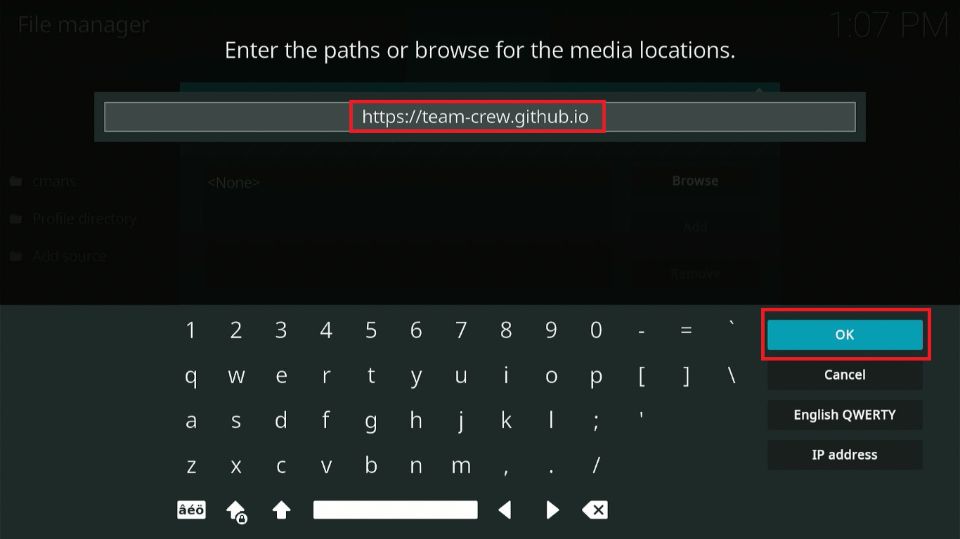
Note: We have provided the source URL for each addon in our best addons list. You must type the exact URL in the box, as shown in the image below.
For example, the source URL for the Unleashed Kodi addon is https://team-crew.github.io.
Disclaimer: This URL belongs to the developer of the addon. FireStickTricks does not host any URLs. We are also not affiliated with the developers.
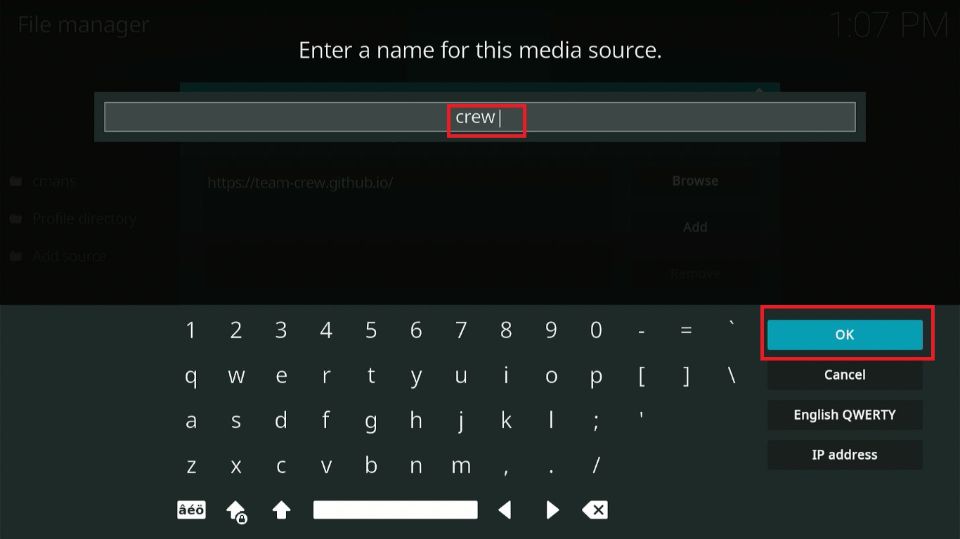
6. Next, type the source’s name in the field Enter a name for this media source and click OK.
Note: You may choose any name you like. The idea is to make the name identifiable with the source. For example, I decided Crew to mirror the name of the source I’m using in this example.
7. After, select the OK option below the source input box.
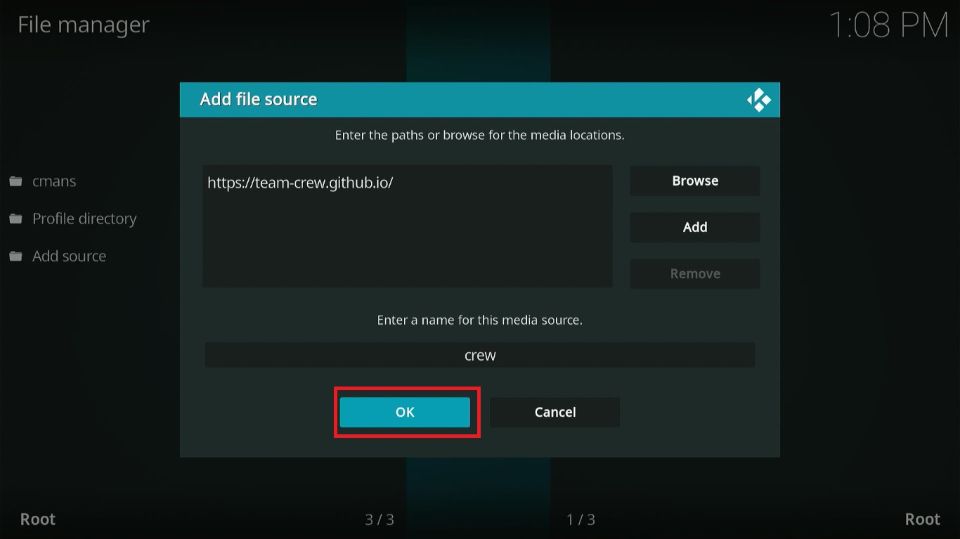
You have successfully added the source, so Part 1 is complete. Let’s move to the next part, where we will install the repository.
Part 2: Install the Repository
Here are the steps to install the repository:
1. Now go back to the Kodi Settings page and click Addons.

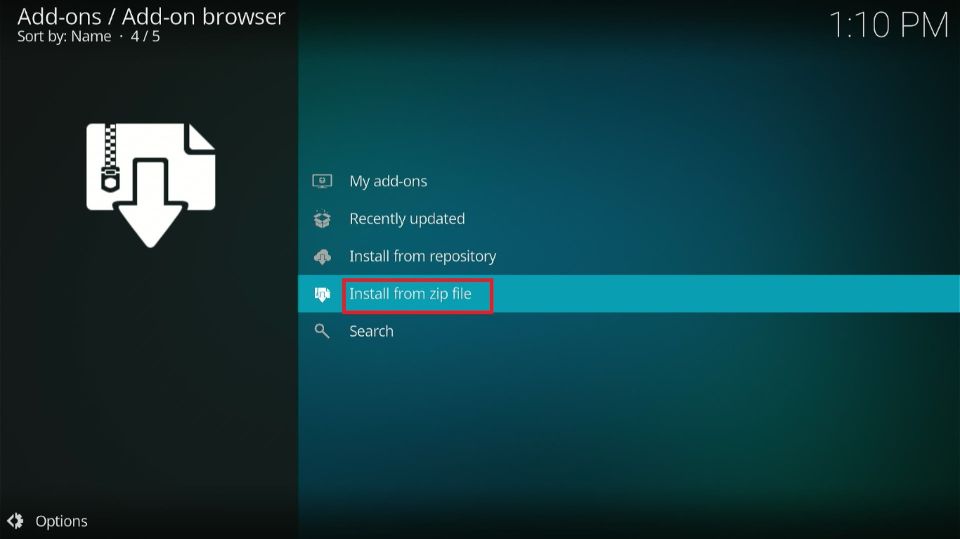
2. Select the Install from Zip File tab.
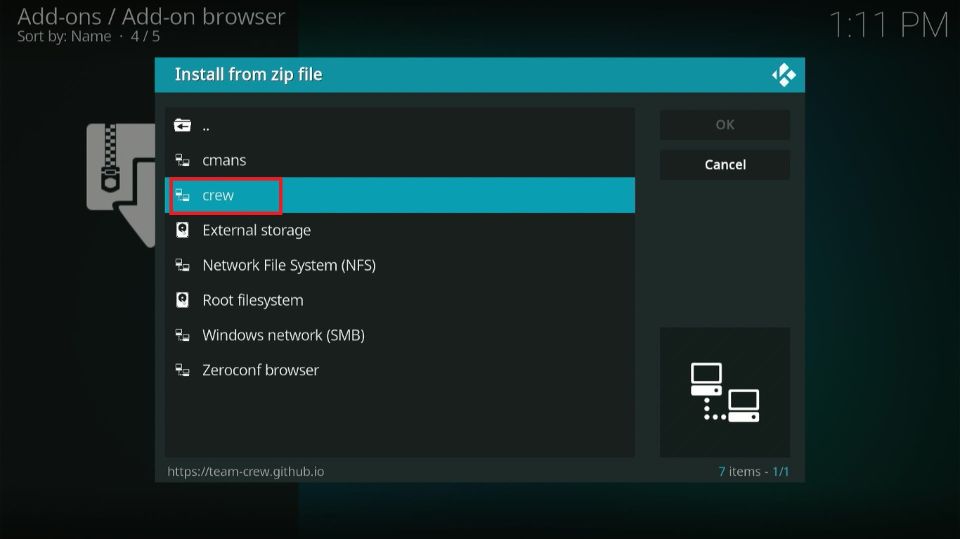
3. Now, you must click the name you chose for the source earlier in Step 6.
Note: Remember that for this example, I chose the name Crew.
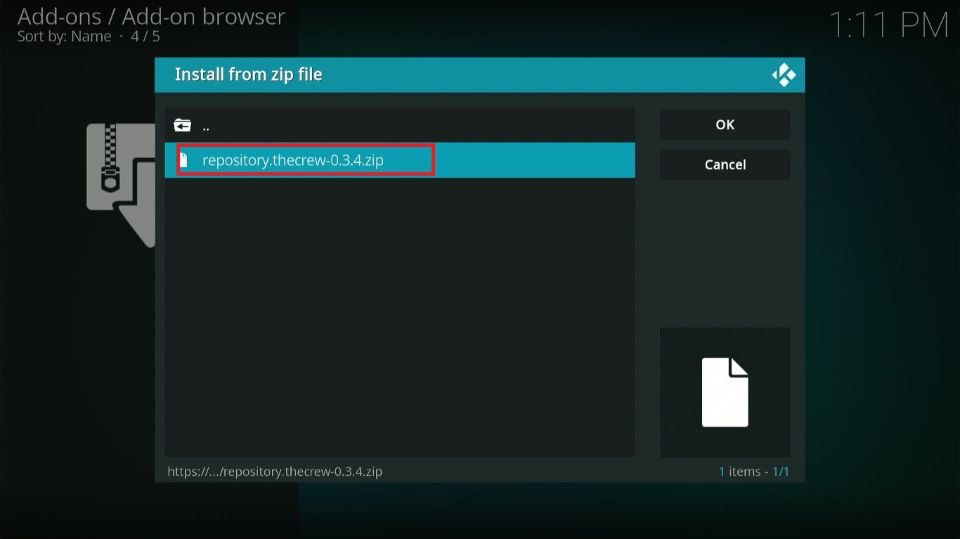
4. On the following screen, you should see the zip file for the repository. Select it.
Note: Sometimes, you may not find the repository zip file when you click the source name. Some repositories are hosted inside the folders within the source. If you see a folder after clicking the source name, open the folder to find the zip file. The zip files usually use the following naming convention: repository.repositoryname-x.x.x.zip
5. Now, wait for the Crew Repo installed notification, which appears at the top right of the window.

You have successfully installed the repository and completed Part 2. We’ll now move to the third and final part, where we’ll install the addon from the repository.
Part 3: Install the Addon
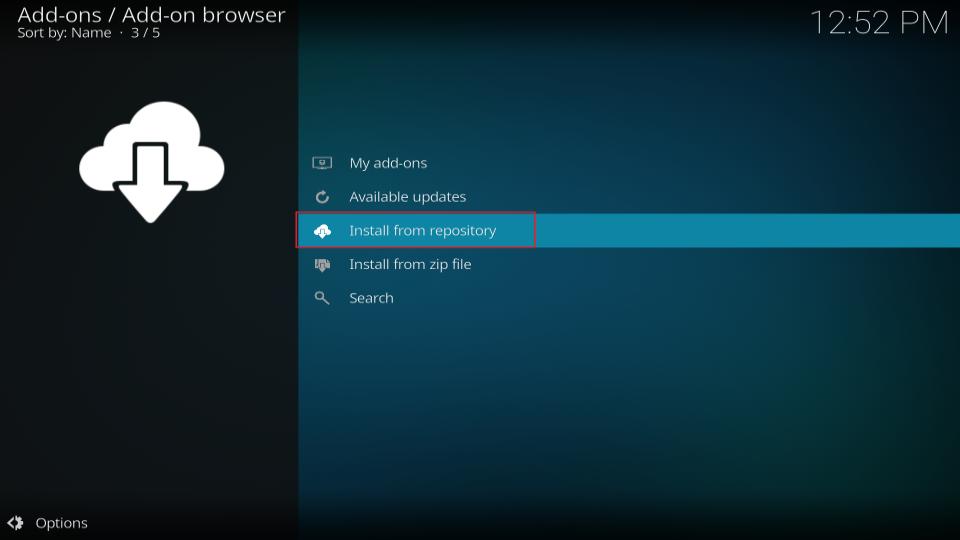
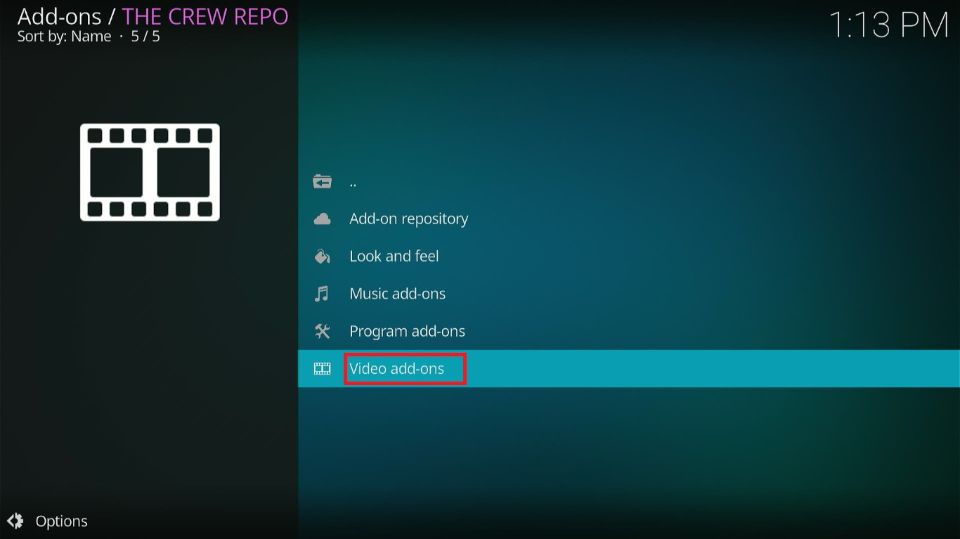
1. Return to the Addons main page and click the Install from Repository option.
2. Click the repository you have installed (The Crew Repo in the example).

3. Select Video addons.
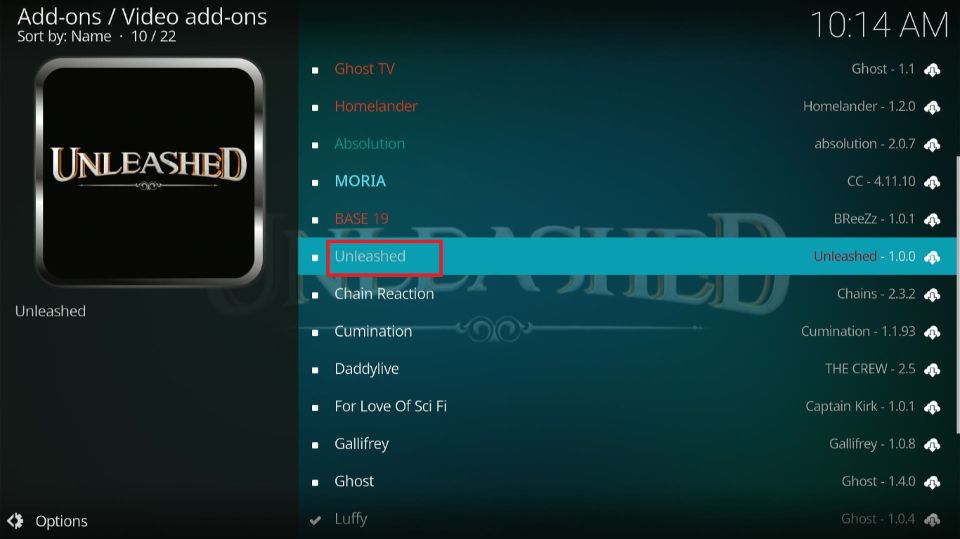
4. Next, click the addon you wish to install from the repository (Unleashed in the example).
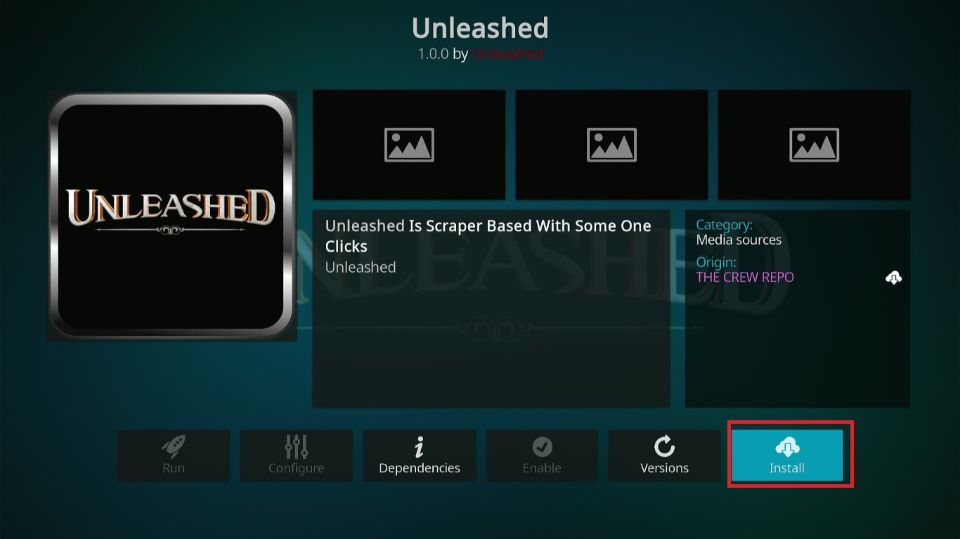
5. Go to the bottom-right corner of the installation page and select the Install button.
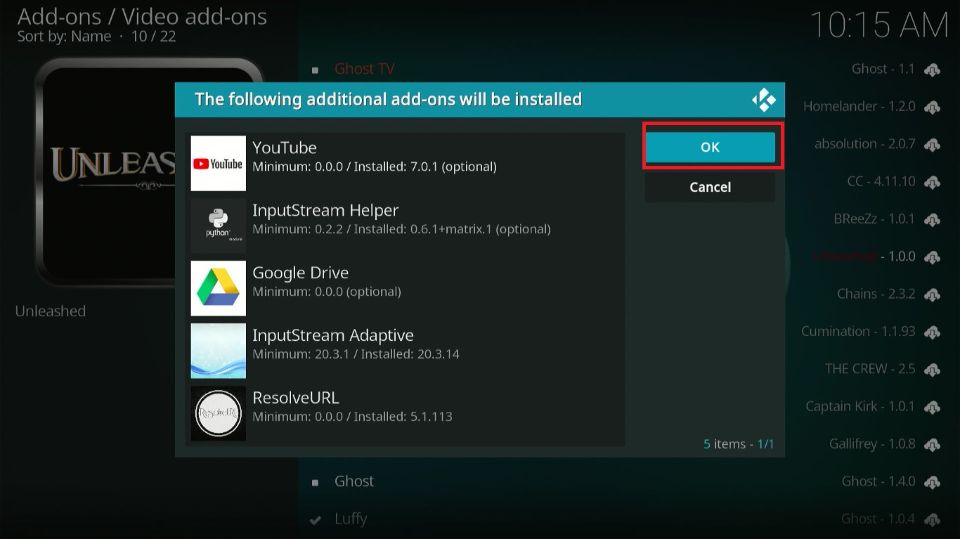
6. A window showing additional addons to be added along with Unleashed will appear. Click OK.
7. Wait for the Unleashed Addon installed notification in the window’s top-right corner.
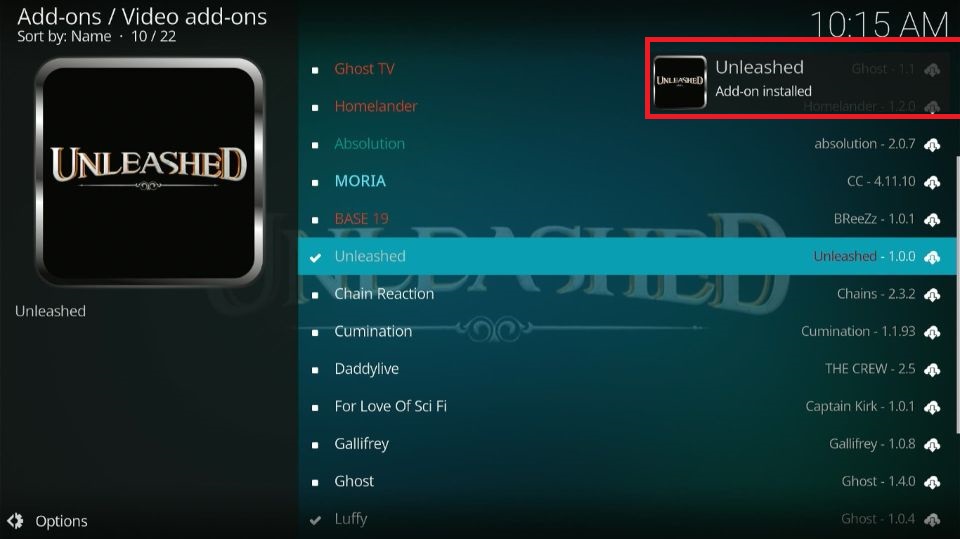
That’s it! You have successfully installed the addon of your choice. Now, access it from the Kodi Home-screen > Addons> Video Addons.
Before you start streaming with Kodi Addons or Builds, I would like to warn you that everything you stream on Kodi is visible to your ISP and Government. This means, streaming copyrighted content (free movies, TV shows, live TV, and Sports) might get you into legal trouble.
Thankfully, there is a foolproof way to keep all your streaming activities hidden from your ISP and the Government. All you need is a good VPN for Kodi. A VPN will mask your original IP which is and will help you bypass Online Surveillance, ISP throttling, and content geo-restrictions.
I personally use and recommend ExpressVPN, which is the fastest and most secure VPN. It is compatible with all kinds of streaming apps and devices.
NOTE: We do not encourage the violation of copyright laws. But, what if you end up streaming content from an illegitimate source unintentionally? It is not always easy to tell the difference between a legit and illegal source.
So, before you start streaming on Kodi, here's how to get VPN protection in 3 simple steps.
Step 1: Get the ExpressVPN subscription HERE. It comes with a 30-day money-back guarantee. Meaning, you can use it free for the first 30-days and if you are not satisfied with the performance (which is highly unlikely), you can ask for a full refund.
Step 2: Click HERE to download and install the ExpressVPN app on your streaming device. If you are using a FireStick, I have given the exact steps starting with Step 4 below.
Step 3: Click the Power icon to connect to a VPN server. That's all. Your connection is now secure with the fastest and best VPN for Kodi.

The following are the steps to install Kodi VPN on your Fire TV devices. If you have other streaming devices, follow Step 1-3 above.
Step 4: Subscribe to ExpressVPN HERE (if not subscribed already).
Step 5: Go to Fire TV Stick home screen. Click Find followed by Search option (see image below).

Step 6: Type Expressvpn in the search bar and select when it shows up.

Step 7: Click Download.

Step 8: Open the ExpressVPN app and Sign in using the email ID and password that you created while buying the ExpressVPN subscription.

Step 9: Click the Power icon to connect to a VPN server. That’s all. Your FireStick is now secured with the fastest VPN.

Wrapping Up
I showed you exactly how to install any addon on Kodi. The installation procedure is essentially the same for all addons, with the main difference being the source URL for the repository containing the addon you want. If you encounter any difficulties, let me know via the comments section below, and I will guide you through the exact steps.
Alternatively, you can use this site’s search function to find an individual tutorial for any of the best Kodi addons. If you can’t find the tutorial for an addon you want to install, let me know, and I’ll write it for you!
Related:
- How to Install Addons over Builds
- How to Install Multiple Kodi Builds
- How to Install Asgard Kodi Addon
- How to Set up Trakt on Kodi

Suberboost Your FireStick with My Free Guide
Stay Ahead: Weekly Insights on the Latest in Free Streaming!
No spam, ever. Unsubscribe anytime.

get to the step where you go to the video add ons and I can’t find it
Hi Dave, which version of Kodi are you using?
I just installed exodus redux but how do I watch. Not understanding
Hi Bill, just go to Kodi home-screen > Addons > Video add-ons. Open Exodus Redux and browse the categories.
I have been trying to add the Tombstone Kodi addon but when I click on install from zip file that is as far as I get, it does not show the install from repository. Can you please help me to get this addon.
Hi Wonda, I don’t think Tombstone addon works anymore. Why don’t you try other quality addons from our list of Best Kodi Addons.
So I downloaded addons but I can’t get nothing to stream.
Hi Lauri, which addons did you install? Have you tried some from this list: https://www.firesticktricks.com/best-kodi-addons.html
Why does it say do you still want to add addon on kodi even though ur not connected to a network
Hi Heather, which addon are you trying to install?
Added exodus but when I click it it’s just a black screen
Hi, I just checked and both Exodus Redux and Exodus V8 are loading fine. You might have run into a temporary issue. Please try again.
Also having trouble with the zip files
Hi Stephanie, which addon are you trying to install?
didn’t work for me..
Hi Linda, these are just the generic steps. Which addon were you trying to install? Let me know and I will give you the specific steps
I having trouble installing from the zip file
Hi Savier, I just noticed that the Maverick Repo link provided in this guide is no longer functional. I will update this guide today. In the meantime, please try one of the other addons from our list: https://www.firesticktricks.com/best-kodi-addons.html
You will find the link to the installation guide for most addons